Reset PC with a custom recovery image - PART I.

Sidenote: This might also mitigate the YellowKey vulnerability
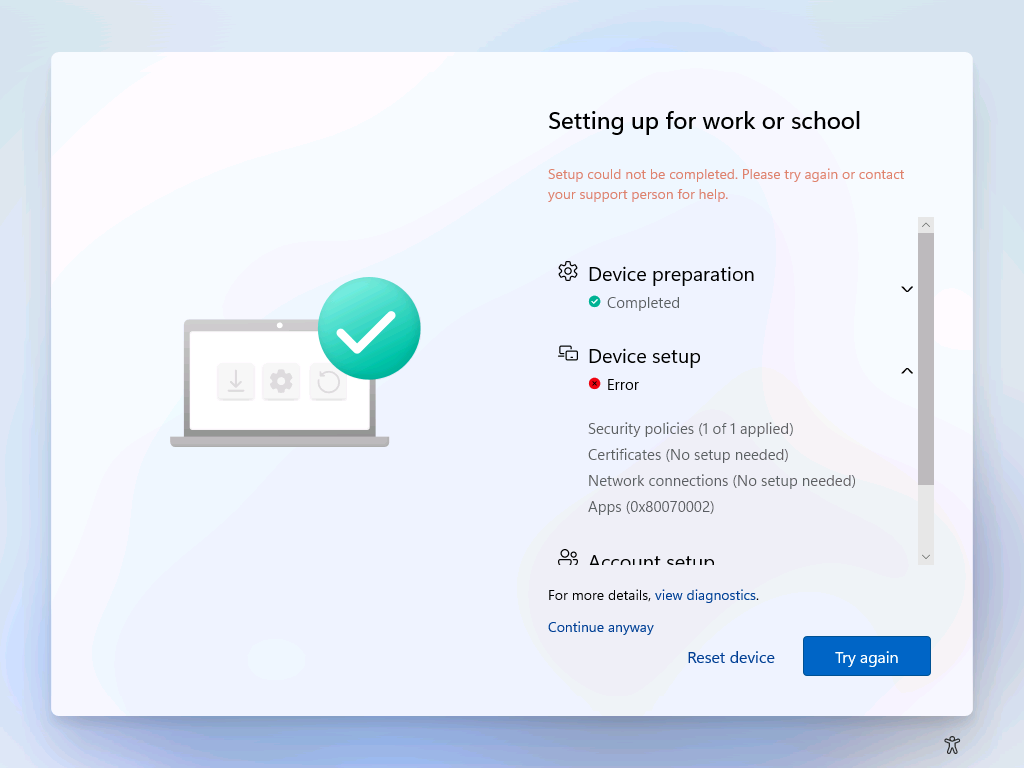
I've become increasingly frustrated with the Reset this PC feature lately. It's simply not reliable. In the middle of an Autopilot migration project, that becomes particularly painful.
Microsoft has not only broken the Reset functionality multiple times over the last 12-18 months, but also introduced a BitLocker-related security vulnerability tied to the Recovery partition. On top of that, I ran into some legacy issues caused by an old SCCM task sequence.
Devices without a recovery partition
Long story short, an SCCM task sequence bug resulted in a few hundred devices being deployed without a Recovery partition before the issue was fixed.
Devices with an oversized recovery partition
After fixing the task sequence, 1% of the disk was allocated to WinRE. Even on a 256 GB SSD, that results in roughly 2.4 GB for the Recovery partition. Not ideal, but honestly not a major problem.
Devices with multiple recovery partitions
Some devices were originally deployed with Windows 10. Their Recovery partition was only 650 MB and wasn't located at the end of the disk. After upgrading to Windows 11 23H2, several Windows updates began complaining that the Recovery partition was too small. Some updates even failed to install. A later upgrade to Windows 11 24H2 created a new Recovery partition at the end of the disk, although it was still somewhat undersized for the solution I'm about to describe.
The Autopilot Challenge
Autopilot requires a "clean" Windows installation. At first glance, either of these options might seem useful:
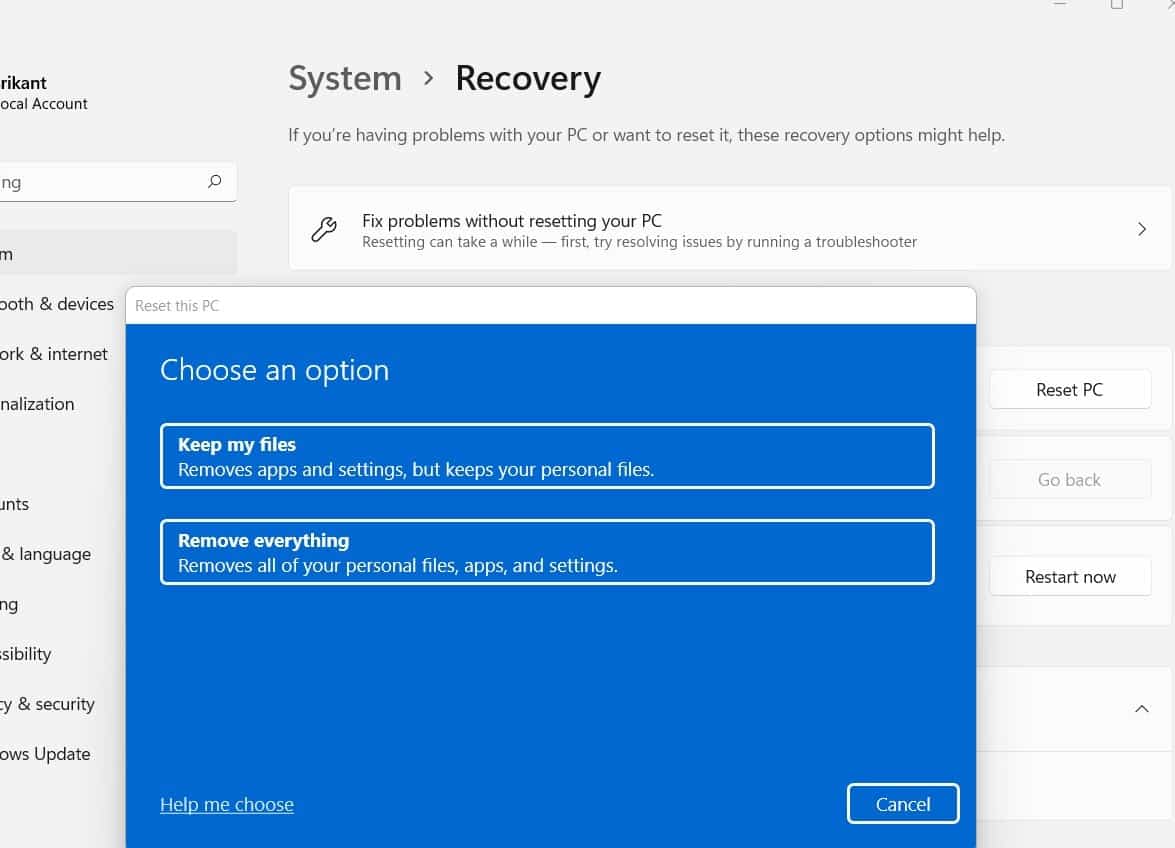
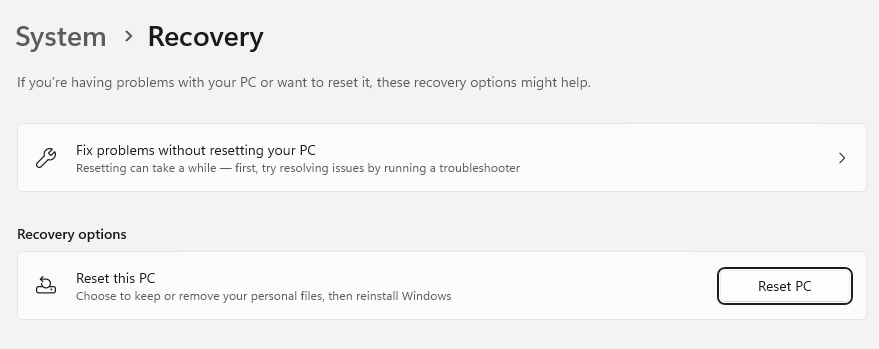
- Reset this PC from Windows Settings
- Reset from the Intune Company Portal
Unfortunately, both have drawbacks:
- Reset from the Windows Settings menu requires administrative privileges.
- The Company Portal reset immediately removes the device object from Intune, regardless of whether the actual reset succeeds.
If the reset fails, the device is left in a broken state. In those situations, recovery often involves running dsregcmd /forcerecovery which usually would involve some IT assistance.
OSDCloud
I'm a big fan of OSDCloud. Huge thanks to David and Ákos for creating a project that has been an absolute lifesaver in situations like this.
The project recently gained support from Recast while remaining open source and free to use. We're going to leverage OSDCloud to create our own custom Recovery environment.
The plan
My objectives are:
- Hide the Reset option in Company Portal.
- Allow users to migrate to Autopilot on demand or according to a planned schedule.
- Fully automate the device reset and reinstallation process, requiring minimal to no user interaction.
Ideally, the only thing a user should have to do is connect to Wi-Fi. Even that step can be skipped in locations where a known wireless network is available.
To achieve this, I'll replace the contents of the Windows Recovery partition with a customized OSDCloud .wim image that includes:
- Injected Wi-Fi drivers
- Branding and wallpaper
- Fully automated deployment logic
- Autopilot-ready result
Prerequisites
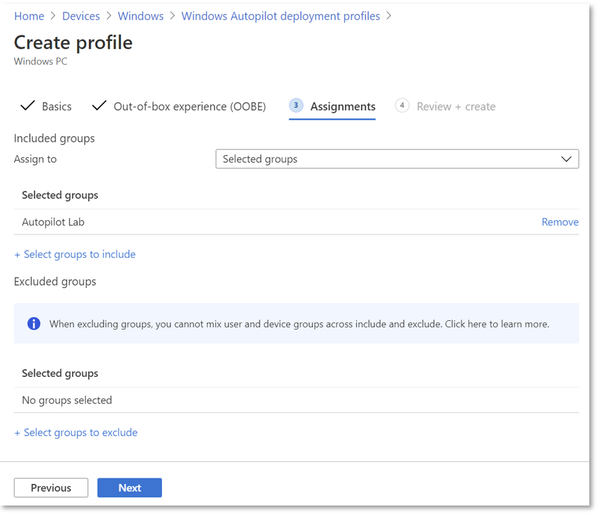
Your standard Autopilot setup should already be in place:
- Hardware hashes collected
- Deployment profiles assigned
- Enrollment Status Page configured
- Reliable Autopilot deployment experience from the Windows login screen, complete with company branding, apps, etc.
The pre-prerequisite
We'll use OSDCloud. I strongly recommend performing the build process on a clean Windows 11 test machine. OSDCloud relies on certain system components and APIs that may trigger security tools in heavily managed enterprise environments. Best to use a vanilla Windows device.
Installing the required components
OSDCloud requires both:
- Windows ADK
- Windows ADK WinPE Add-on
The WinPE version should closely match the operating system version you're using.
For example:
- Windows 11 25H2 works fine with WinPE 26100.2454
- WinPE 28000 may introduce compatibility issues
First, verify available packages:
winget search "WindowsADK"
Install the required components:
winget install Microsoft.WindowsADK
winget install Microsoft.WindowsADK.WinPEAddon
To install the ADK components
And install the PowerShell module:
Install-Module OSD -ForceTo install OSD cloud module
Building the recovery image
I won't dive too deeply into OSDCloud itself. In short, it's a tool that creates custom Windows deployment media capable of injecting drivers and performing automated deployments before Windows even boots for the first time.
For our use case, we'll create a customized recovery image.
Create the template
Use WinRE rather than WinPE because we want Wi-Fi support. You can name it for the ease of identifying it later. This mounts the ADK boot image and injects the required components:
New-OSDCloudTemplate -WinRE -Name RecovarrNot another member of the *arr suite 😄
Create the workspace
This copies the generated image into a workspace where we can customize it further:
New-OSDCloudWorkspace -WorkspacePath c:\RecovarrCustomizing the image
The following example:
- Downloads Dell WinPE drivers
- Adds a custom wallpaper
- Injects additional Wi-Fi drivers
- Imports a Wi-Fi profile
- Starts OSDCloud automatically
Edit-OSDCloudWinPE -CloudDriver Dell -Wallpaper C:\temp\wallpaper.jpg -Brand Recovarr -StartOSDCloud '-OSBuild 25H2 -OSEdition Enterprise -OSLanguage en-us -OSActivation Volume -ZTI -restart' -DriverPath c:\temp\myWiFi -WifiProfile c:\temp\mywifiprofile.xmlWhat each parameter does
Edit-OSDCloudWinPE
The cmdlet responsible for customizing the WinRE image.
-CloudDriver Dell
Downloads and injects the latest Dell WinPE driver pack. Some network adapters might work out of the box, although Wi-Fi support can vary. You can use a few options here - get-help Edit-OSDCloudWinPE will tell you, HP, Lenovo, *, Nutanix, VMWare as I recall...
-Wallpaper
Purely cosmetic, but useful for displaying instructions such as "Hands off, deployment in progress."
-Brand
Shown within the OSDCloud interface. Not critical, but it's a nice touch.
-StartOSDCloud
This is where the magic happens.
The deployment will automatically:
- Install Windows 11 25H2
- Deploy Enterprise edition
- Use US English
- Volume Activation
- Run in Zero Touch Installation mode
- Restart after the deployment is done
The -ZTI switch suppresses the disk wipe confirmation prompt, assuming the device only contains a single physical disk.
-DriverPath
Use this to inject additional Wi-Fi adapter drivers, typically these consist of .inf, .sys, and supporting files. OSDCloud detects them automatically and injects them into the boot image. Neat!
-WifiProfile
Provides a known wireless network configuration in an XML format.
Export an existing profile from a Windows device with:
netsh wlan export profile <SSID> key=clearThe key must be exported in clear text for OSDCloud to be able to use it.
The result
If everything completed successfully, you'll find a boot.wim file in:
C:\Recovarr\Media\SourcesDepending on how many drivers you've injected, the image size will typically range from a few hundred megabytes to roughly 1.2 GB.
Replacing the built-in recovery partition
This is not particularly difficult, but if you want to automate it, I'll get to that in a Part II blogpost. For now a quick manual test on a test device.
WARNING: you might break this windows install so save your data!
I am using two commands in the terminal, diskpart and reagentc.
To disable the current Recovery partition:
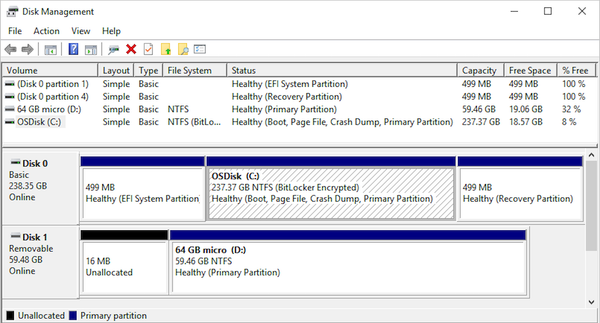
reagentc /disableA usual Windows 11 partition table looks like this. This is on my 512 Gb SSD in the test laptop.
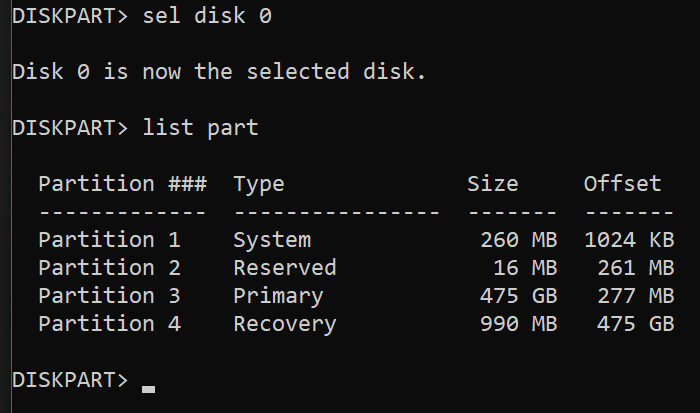
The sequence of commands for this manual test:
sel disk 0
sel part 4
delete partition override
sel part 3
extend
We now have disabled and deleted the recovery partition as well as extended the primary data disk.
NOTE: This is just to emulate the scenario where machines do not have a recovery partition at all. Ok, then back to diskpart
You'll most likely will have a GUID partition table and for that this is how to create a new recovery partition shrinking the data partition by 1500 megs:
sel part 3
shrink desired=1500
create partition primary
set id="de94bba4-06d1-4d40-a16a-bfd50179d6ac"
gpt attributes=0x8000000000000001
format
assign letter=R
After this you should have an R: drive that is visible in File explorer
Create a Recovery folder, and inside that create a WindowsRE folder. Copy the boot.wim file here and rename it to Winre.wim.
Back in the terminal (all one row \\?\GLOBALROOT... sorry for my CSS):
reagentc /setreimage /path \\?\GLOBALROOT\devices\harddisk0\partition4\Recovery\WindowsRE
Then let's enable it:
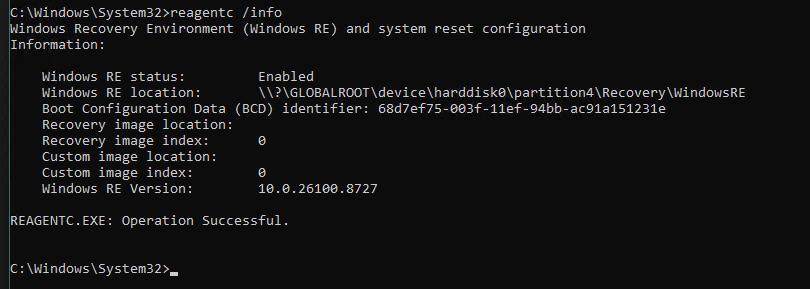
reagentc /enableAnd see if it's active:
reagentc /infoIf all went well - and sometimes it doesn't - e.g. when the commands are executed in diskpart in the wrong order - you should see something like this:
Testing
Let's try from terminal:
reagentc /boottore
shutdown -r -t 0 -f
This instructs Windows to reboot and go into recovery. From where OSDCloud takes over:
- Connects to Wi-Fi
- Clears the disk
- Downloads Win 11 25H2
- Lays it to the disk
- Downloads the model specific latest driver pack
- Injects into the image
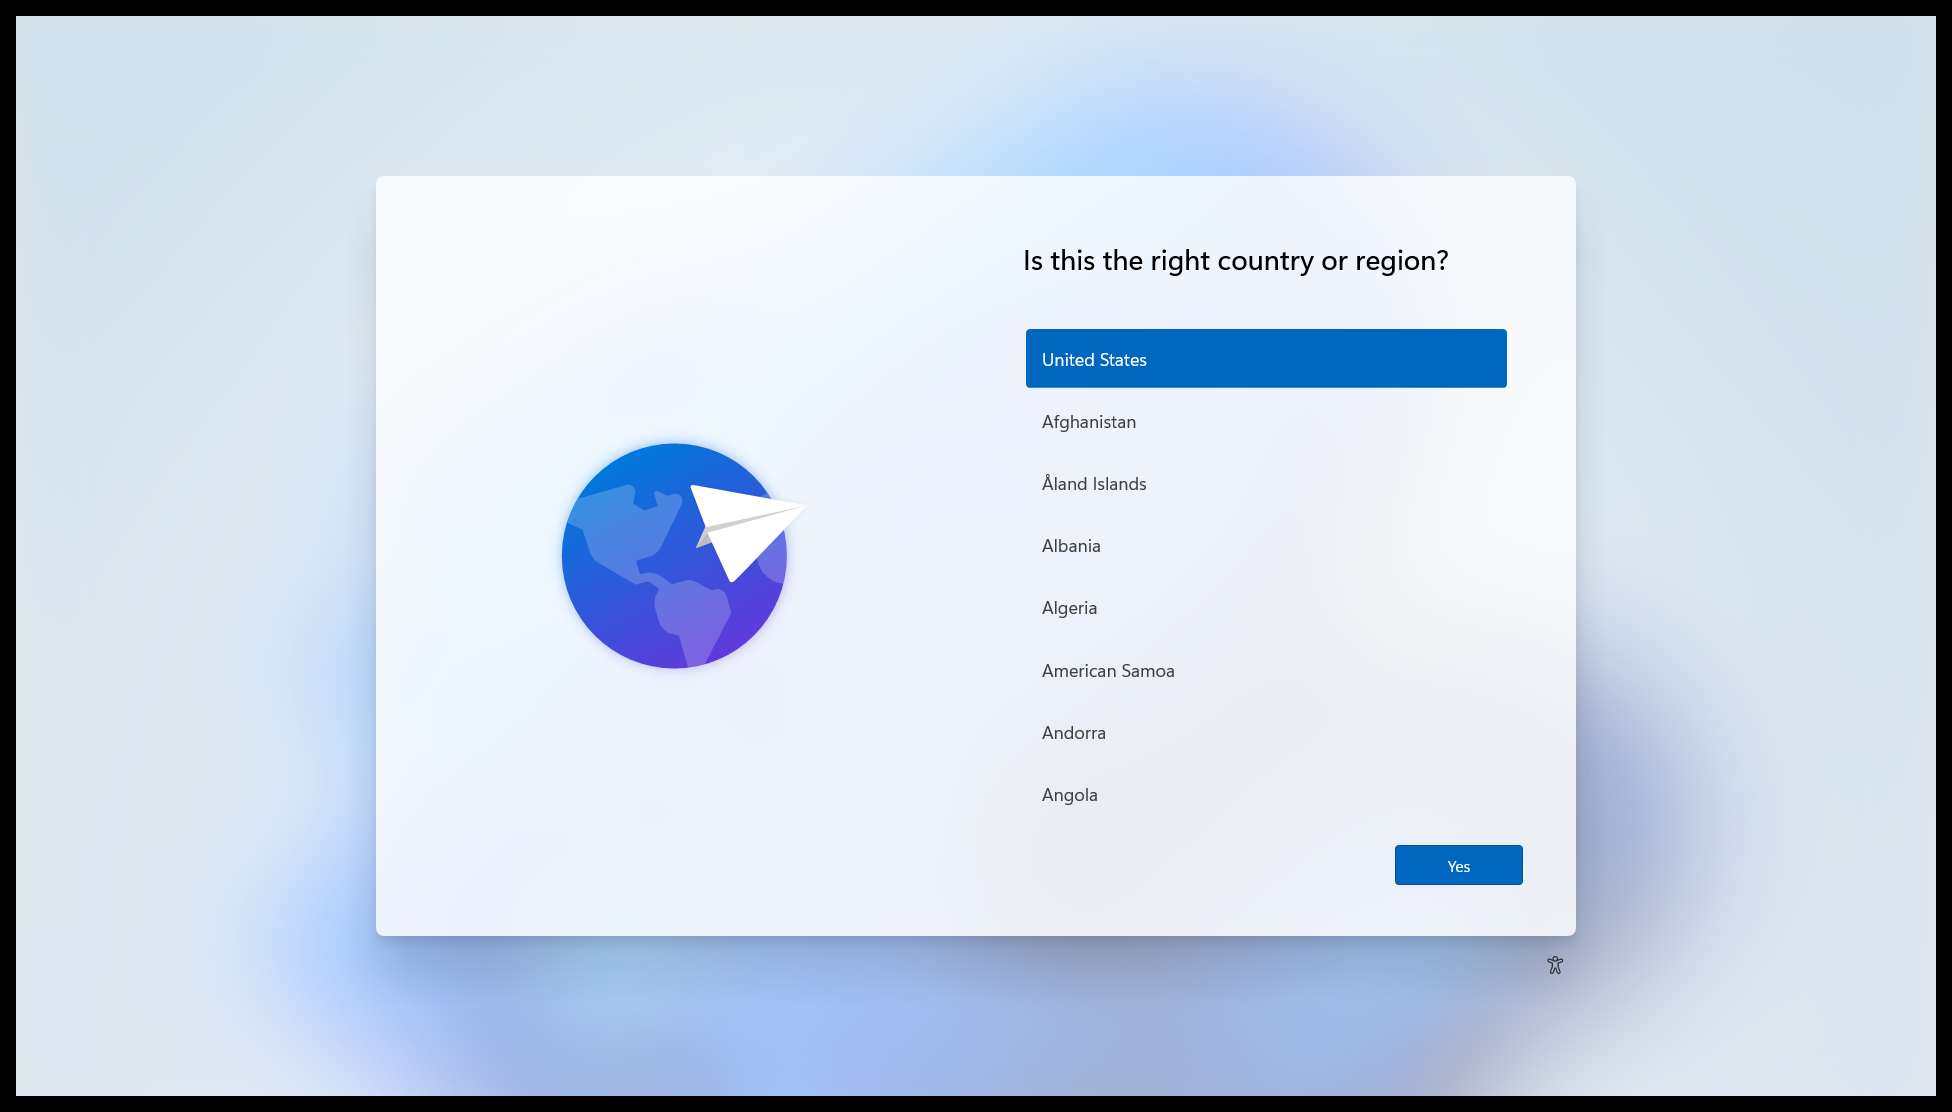
- Device reboots and... you should have a Win 11 OOBE page appear with Language selection
Happy resetting! 😄
To do:
Write PART II.
We'll automate the deployment of the new recovery partition
We'll create an app for the user to click in the Company Portal
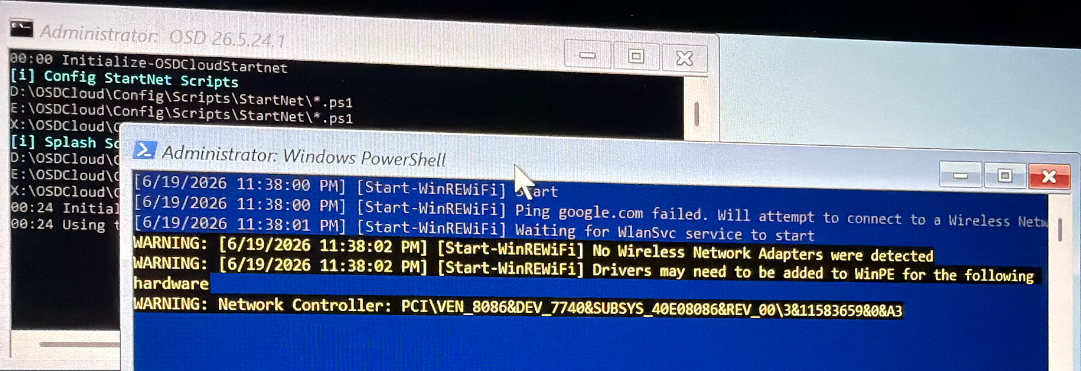
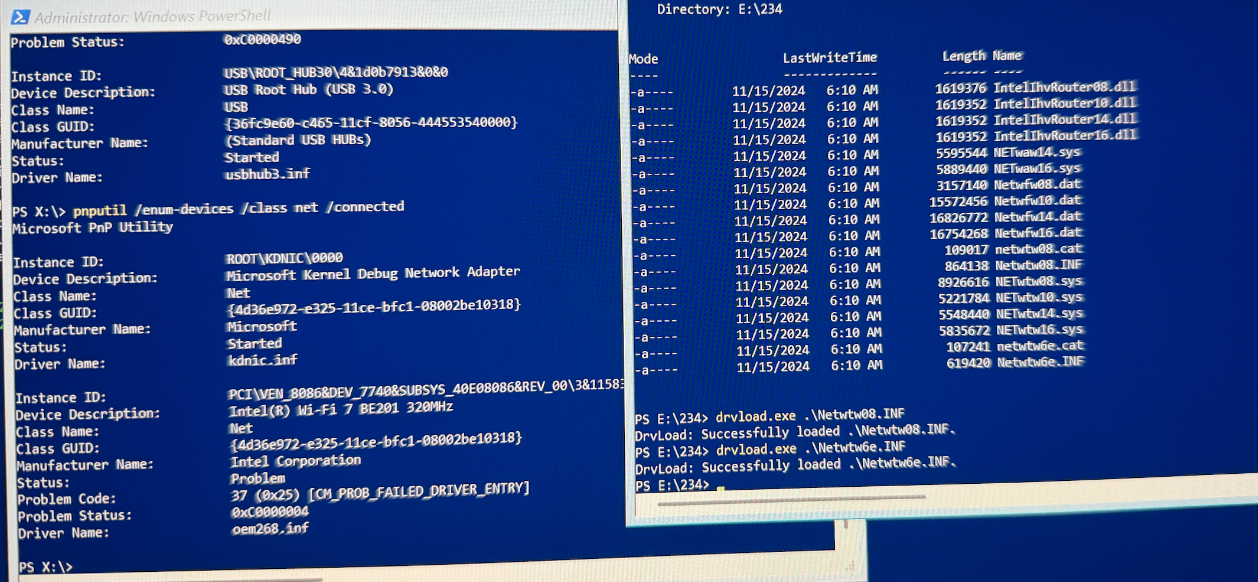
WIFI 7
Unfortunately Wifi 7 drivers don't seem to work (yet) in WinPE/WinRE.
If you know how to make them work, do please let me know. On a device with a WiFi 7 Intel BE201 card the drivers don't load, just give an error 37 (0x25) CM_PROB_FAILED_DRIVER_ENTRY. despite the successful load: